Showing posts with label Quilts. Show all posts

Tuesday, September 23, 2014

Star Patchwork Baby Quilt

Star and Patchwork Baby Quilt
Greetings! Well, fair warning, this post has kind of a lot of photos! I just really, really love this quilt and I was actually sad to send it away. My friend's cousin recently had a baby, and her sister ordered a quilt for me. I've known this family since I was in middle school, so it's always nice to make something for someone you know. The only directions I had were to use a little bit of green to match a nursery, still make it girly, and embroider the baby's name on it. 
Maybe my favorite section. Love that horse and carrot!
Honestly, I had some problems for a while coming up with an idea! I didnt know what pattern or fabrics to use, so I was stumped for many weeks. I did know that I wanted to use a Tina Givens print, "Elephant Flight," which is the center pink square in the bottom row above. It is pink with white elephants dangling from hot air balloons!! I've been wanting to use it in a baby quilt since I ordered it. I had also recently ordered some cute prints from the "Wee Wander" line , which are cute kids and horses and have some green. From there I gathered up 8 or 9 other fabrics from the store, and ended up with what I think is a really fun color palate. Though there is aqua in it, and grey, it still felt new and fresh for me to use, possibly because of the addition of yellow and purple, 2 colors I dont generally use, especially together. 
Embroidered Star
I hadnt made a patchwork quilt in ages, so I thought I'd go that direction, but and the last minute decided to ad a few stars in a light, contrasting print, and I'm really glad I did because it's my favorite part of the quilt now. I cut 4 1/2" squares, and then embroidered the name on an 8" square that would take the place of 4 of the regular patchwork pieces. 
Close-up
For the back I used the elephant print, which I love cut up but also love as a large print, and added one row of scrappy pieces I had left over from cutting the patchwork squares. I quilted straight lines on either side of every seam, which actually didnt take that long on a quilt this size, maybe 90 minutes, and then I also outlined each star, which was tedious and added probably another 45 minutes, but I like it so it's ok. 
The back
For binding I used a coordinating aqua polka dot by Dear Stella, which has a slight bit of stiffness to it that actually makes it really great to work with as binding. Although I have recently learned how to hand-bind, and dont mind it, I must say my machine-binding technique is getting pretty solid too! 

Machine binding
I also really like how the aqua binding looks next to the pink of the backing fabric. Its almost a lavender-y pink, and they look neat together.
More machine binding
I kept this quilt around the store for a few extra days before sending it out because I just didnt want to part with it! I was also able to use a few fabrics that I used in a wedding quilt for the mother of the baby, plus a few fabrics I used in the baby's cousin's baby quilt, so I like that they are all kind of tied together. 
In the harsh light of sunset. 
Also, I sewed these squares up in sections of 2 or 3 at a time, instead of piecing whole rows, and it made a big difference in getting the points to line up. Some still didnt, but a lot more did than normal. Check it out!
Beautiful point matching.... and above, point non-matching
I love every single fabric in this quilt, and I love that even though I've been staring at the same group of fabrics in my shop now for 6 months I was able to come up with a combo that felt new to me. It was a fun quilt to make and I hope baby Marie Elizabeth will love it for years to come!

Thursday, August 7, 2014

Lonestar Quilt

Lonestar Quilt!
I recently finished up another quilt order, for my cousin's best friend's wedding. I saw a giant star quilt on flickr and tracked down the blog, where, happily, there was a tutorial! The one I used was at Bea Spoke Quilts. She gives you the basics on how to make a big star like this.

Quilting in progress
I dont really have an in-progress shots, but it was a pretty quick top to make since all the pieces are so big. I think it showcases fabrics nicely, and, using the wedding invite for inspiration, I decided on a coral/pink/aqua/grey color palette that was mostly, but not all, Art Gallery fabrics. I used Teensy Weensy in Lotus for the background, which is white with tiny, cute little pink and grey plus signs, which I thought was great for a wedding. (available here!)

Attaching the binding
I used a grey fabric for the binding that has tiny gold lines on it. It's hard to capture the details of a quilt in photos! But they're there, I promise.

Lonestar visits Ohio 
I did a line of quilting on either side of each seam, and then traced around the whole star as well. I really like straight-line quilting, which is good because my new machine really sucks at free motion! (constant tension issues. so annoying!) I like how the lines echo out around the star, and I like how they have the star pattern on the back of the quilt, even though that is also hard to see. I added a 3" border of rectangles along the top and bottom of the quilt to make it a little bigger, and I also like rectangluar quilts better than square quilts, so this solved that problem. I think it looks good too!

Art Gallery on the back. 
Although I normally piece my backs I had more than enough of this print, and I really like it as one solid piece for the back. The pops of yellow make me happy. 

It's since been sent off to the new couple (I think!) so I hope they like it and enjoy it for years to come. Up this month, another wedding quilt in similar colors, but triangles! And 2 baby quilts. And, hopefully, customers at the store!

What are you working on?

Friday, July 18, 2014

Sewviver Entry for The Fabric Studio

This is a quilt I've been meaning to blog about for ages but never got around to it! I thought it would be perfect to use it as my entry for the "Sewviver" quilt competition!  It seems like a really fun contest with different challenges each month, so we'll see! 

First, some background on the quilt: when I lived in Indianapolis in 2011 I went through a long phase of listening to the same Dr Dog cd every single day. (I do that a lot with bands... Dr. Dog finally broke the 2-year Paul Simon loop I had previously been stuck in. Happily stuck of course!). There is a line from a song, "what you thought was a hurricane was just the rustling of the wind," and it really resonated with me at the time. Then, I took it to mean that although things always seem big and important in the moment, they usually turn out to not really matter that much. It was a reminder to just calm down and not worry. So I knew I wanted to make something to go in my house with the quote. For the longest time (probably a good 6 months), I didnt know what to make. I thought about a poster, or cross stitch, but didnt seem quite right. Then I think when I was driving to IL to move back to Chicago from Indy it hit me: make a quilt!!


I started working on it while living at home in the fall and winter of 2012. I didnt use any type of pattern, and I made each letter one at a time, in order of how they are written, just improve cutting and hoping for the best, and filling in the rows with the different creams, whites, and golds I had picked out for background fabrics.  Below is a picture of the early stages hanging on the design wall in my parents basement. 


When I moved to Nashville I packed it up and put it on my new design wall. I really went slowly with this quilt because I had no plan ahead of time other than the quote. I just kinda waited until I had an idea that felt right, and then I went with it. I have always loved stars, so I knew they needed to be involved, and then the last side I made, the scattered triangles, I wanted to look like they were blowing in the wind. 


I had the top done for a long time before I started quilting it because I had no idea what to do! The quilt is huge! (For me anyway, and my little Singer). So, I made the back with more stars and some great coral solids that I dont remember what brand or color they are :( Sad! Im bad at keeping track of that kind of stuff. 


At some point I had coffee with a quilting friend and we were looking at examples of text quilts online, and how they were quilted. Like a crazy person, I decided I wanted to do straightline quilting, about 1/2" apart. I would never attempt this again, because it took sooooo long, but I do love how it looks. On the text section, the lines are randomly spaced but no more than an inch (mostly much closer), and they run up and down. On the star section the lines go cross-wise. Then on the part with the triangles I extended the line made by the angled side of the trianlge, and just quilted along that edge. I love that part the best and how it looks random but I actually comes from the shapes in the quilt. 

The pictures below sort of show the quilting lines, but I dont really have any great shots. It took about a year and a half from conception to completion, but so worth it!


And one more, quilt in the sunshine photo.


Thanks for taking a look! I love cuddling with this blanket, love the mix of white, gold, coral, and pink fabrics, and love that I am done and dont have to work on it anymore!

Saturday, June 28, 2014

Lap of Luxe Quilt

I recently finished a quilt for my cousin Stephanie (a great customer of mine!), who needed a somewhat belated wedding gift for her sister and brother-in-law. When we first talked about colors, I was really obsessed with using a certain black solid that I sell in the shop, from Michael Miller's solids line, Cotton Couture. It is such a soft, deep, rich black. So I toyed with a lot of different quilt design ideas, and eventually decided that this just wasnt the time for that black (it'll happen though!).

We picked out teal, aqua, blue, grey, and white as the color scheme, and I added a few other fabrics that had a touch of black too, just so I didnt totally abandon my idea (although I think abandoning ideas is fine!).
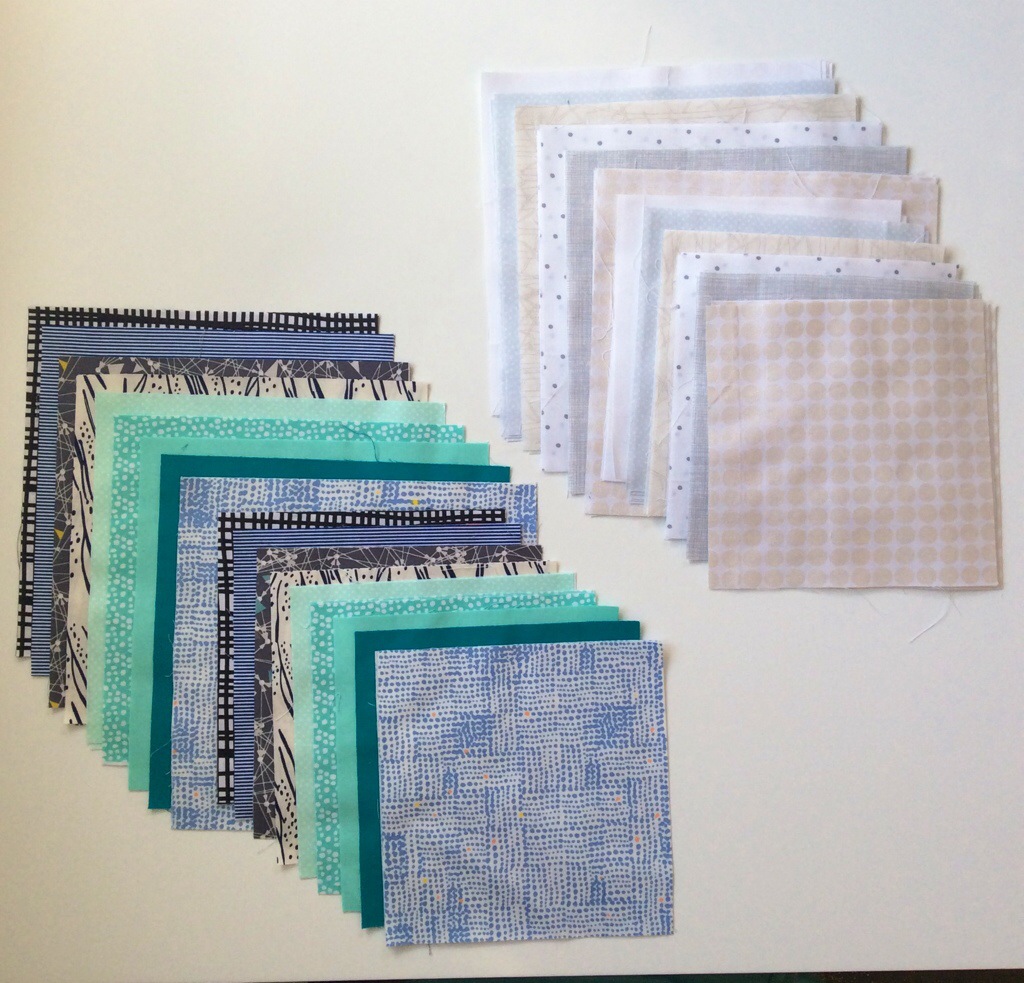
20140628-131643-47803483.jpg

20140628-133643-49003748.jpg
Basting

I had just finished a quilt that was all improv pieced, no pattern, where I make squares and then fill in the background. I love doing quilts like that, but I really wanted a pattern for this one, so I could cut out a stack of pieces, sew them all together, and mindlessly follow directions. Nothing wrong with that! I found a pattern that uses half square triangles in an interesting way, and creates fairly large blocks, and I thought it would be perfect! (It's called the Lap of Luxe quilt, found on the Art Gallery blog, here).

20140628-133644-49004153.jpg
Finished Quilt!

I made 30 blocks, which each measured 13 1/2" square I believe. I used a combo of fabrics from the store and older favorites I had at home. There is a good amount of Art Gallery fabrics, some Robert Kauffman, a little Anna Maria Horner. The background is made of 5 different light grey or white fabrics which I think keeps things interesting. I used to love all white backgrounds, but I've been more into the scrappier look lately for whatever reason.

20140628-133643-49003272.jpg
Back
The back is something I was actually really excited about because it is still relatively straight! Usually my quilt backs go a bit diagonal, but I think having my big work table at the store helps, it is great to baste on! I used a big piece of Lotta Jansdotter print in the middle, with two panels of a graphic grey and white fabric along the sides.

20140628-133644-49004799.jpg
Straight-line quilting

I quilted it by doing a straight line along either side of every seam. I like the tiny boxes it created, and I think it is just the right amount of quilting, about every 7". It gives it some quilted structure, but doesnt distract from the pattern.

Also, you cant really tell in the pictures but the binding is pieced too, I used 3 different greys, a stripe, a polka dots, and a cross-hatched one. They are subtly different, but I like how they look  a lot.

So now I just have to add the names and wedding date to the front and this baby will be all finished! I really liked using this pattern, and definitely recommend it, especially if you want a good looking quilt that doest take endless amounts of time.

I hope the recipients like it too!

Friday, May 9, 2014

Pixelated Heart Quilt

[caption id="" align="aligncenter" width="620"]20140509-121930.jpg Heart Quilt[/caption]

The great thing about patchwork is that it can be turned into so many different things. You can make it random, make stripes, make diagonal lines, and also make shapes, like this heart! I have always loved this quilt, by Blue Elephant Stitches, and always wanted a reason to make one.

[caption id="" align="aligncenter" width="570"]20140509-121936.jpg Neon Dots binding and Dear Stella fabric on the back[/caption]

I'd had a pile of fabric set aside for awhile that was pinks, corals, oranges, that little bit of aqua from one of Jay McCarroll's quilting lines, plus the neutrals and the few little bits of neon and strawberries. I thought about making some type of star quilt but never did. Then one my my best friends had a baby girl and I thought this would be the perfect color palate for her quilt. I used 3 1/2" squares and the quilt finished a little smaller than I normally make my baby quilts, and I also fell in love with it and didnt want to give it away. Is that bad?! I realized it would look perfect in the empty space above some of my shelving in the store. Not to worry, I made Mary another baby quilt (the orange and pink one from this post), and I kept this one for myself.

[caption id="" align="aligncenter" width="586"]20140509-121950.jpg Keeping watch over the store[/caption]

I really love the way it looks hanging up there, so I'm glad I kept it even though it did feel a little bit wrong... I am normally really good about giving quilts away, but there was just something about this one I didnt want to part with :) Plus I'm teaching a patchwork quilt class, so I definitely need an example in the classroom, right?!

Thursday, April 24, 2014

Half Square Triangle Baby Quilts!

20140424-102531.jpg
Fabric Pull!
Recently I got an email from a friend requesting a baby quilt that will be for a little boy. The only restrictions were that it be modern, crisp, and use the color scheme of navy, turquoise, and grey. I added a little black and white in, and was set! I love this color palate so much, in fact it's one of my faves in recent memory. I have been wanting for ages to try a quilt made with randomly placed half square triangles (like here, here, and here), and so I thought this would be the perfect time to try!

photo-41
Pieces cut and ready

I started by cutting my fabric into 7" squares and then dividing them into 2 piles of light and dark fabrics (28 square of each). I matched a light square up with a dark, right sides facing, for my favorite half-square triangle method, and drew a diagonal line across the square.

photo-42
Chain piecing
I happen to have a 1/4" foot for my machine, which is very handy for this method. Just line up the diagonal line you've drawn on the fabric with the blade edge of the foot, and you'll get a seam that's 1/4" away from the line. I chain pieced my squares and then sent them through the other way, getting a second seam 1/4" away from the other side of the seam. Before I had this foot I simply used a ruler to draw lines 1/4" away from the center line, then sewed over those. But this method was faster!

photo-43
Trim blocks!
I must admit that for the first quilt I didnt trim my blocks, so the seams did not exactly match up. I can get a bit lazy at times. But I made the quilt again, for a baby girl, and I trimmed down the finished half-square triangles to 6" squares. Much better.

20140424-102546.jpg
Baby boy half square triangle quilt
I just laid out the squares in a manner that I thought looked random, but wasnt actually random because I tried not to have the same fabric right next to itself. It mostly worked out, though I didnt realize until later that one row had three triangles of mustache fabric in it. How do those things sneak past?

20140424-102552.jpg
Straight line quilted
For the blue quilt I did diagonal quilting about every 2 inches. I didnt want to do anything that relied on the seams, since they were no where near perfect, so this was a good option. I used Michael Miller's Domino in navy for the binding, and I cant for the life of me remember what the backing is called, but it is from Spool, in Chatanooga, TN.

20140424-102603.jpg
Girls half square triangle quilt
I made the second version in a  really fun palette of pinks, orange, yellow, gold, and a big of white and neon and I really like this one too. It seems cheerful and warm and a good summer picnic/play blanket. (they both measure around 42" x 48")

20140424-102609.jpg
More straight line quilting
I did the quilting lines 1" apart and 3" apart on this one, which I think I like a little bit better, for whatever reason. The binding is a cute pinwheel pattern by Anna Maria Horner, and the back is an extremely soft Micahel Miller print called Pollen. Sending them off to the recipients this week, so I hope they like them!